

.

articles/Commercial/onegrafilitetwografilites-page2
Published 01/02/2009
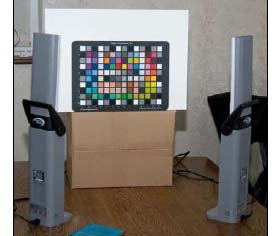
The image of the white board may be used as a 'luminance mask' to fully correct the density variation across a piece of artwork, and is worth explaining. The technique is particularly useful if you are shooting in less than ideal circumstances with difficult artwork placement (typified perhaps by having to photograph a piece in a stately home or an antique dealers, with uncontrolled light coming in). In a real example we had an unreachable skylight sending light down from above, creating about 3/4 stop difference between the top and the base of the art. A luminance mask, made from a sheet of white card, placed in front of the painting and photographed, was used to true up the final reproduction. Here is how it works:
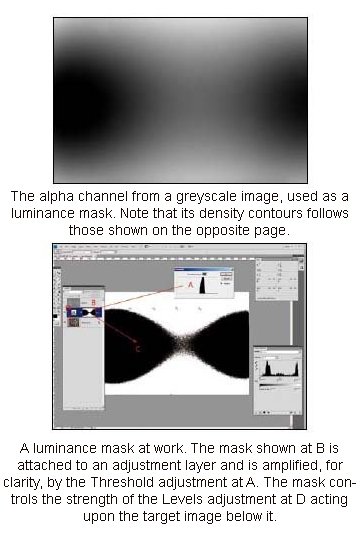
The image of the card to be used as a mask can be either a negative, or a positive image of the card, depending upon the density correction that is to be made. The single channel of the greyscale image of the card is dragged onto the image of the artwork, as an alpha channel. This alpha channel is then used as a Layer Mask, attached to an adjustment layer (eg levels, curves or HSB-Lightness).
Where the mask is black it prevents the adjustment layer acting (ie changing density values), where it is grey it allows a proportion of the changes to take place. The mask must therefore be adjusted in density, but retain the shape of the illumination pattern. This is why you have to think about whether you need a positive or a negative. If you are bringing a dark value up to a light value and the light value is the aim point, then the lighter art area must be protected by a black portion of the mask. If however, you wish to bring the lighter area down in density (ie darker) then you must have the light area unprotected by a whiter area of the mask. The technique of luminance masking is easier to perform than write about, so the advice is to shoot a few trials and convince yourself you can do it - you can with a bit of care and it does work! Think about adjusting the density of the mask by accessing it in the channels palette and then using the normal correction tools such as curves or levels.
* Colour Rendering Index
The Colour Rendering Index is a measurement of how good a light source is at mimicking pure daylight (which has a CRI of 100). The measurement is fraught with difficulties, to the extent that the CIE technical committee examining the subject was dissolved in 1999, without publishing any firm recommendations. Ignoring all this geeky stuff, what CRI does is examine a group of eight colours (see below) and assesses how thay are depicted in a particular type of illumination.
For example, a low pressure sodium lamp can only reach a CRI of about 5, a low quality fluorescent about 50. Incandescent bulbs are really good, they mimic the sun well and can reach values of 100. Only the highest quality fluorescent bulbs can reach above the 90 required for meeting ISO 3664 standards. CRI measurements are unreliable below colour temperatures of 5,000°K. For interest, the CRI colour test set includes:
Light greyish red
Dark greyish yellow
Strong yellow green
Light bluish green
Light blue
Light violet
Light reddish purple
Strong red
Strong yellow
Strong green
Strong blue
Light yellowish pink(skin)
Moderate olive green(leaf)
Asian skin
There are 0 days to get ready for The Society of Photographers Convention and Trade Show at The Novotel London West, Hammersmith ...
which starts on Wednesday 14th January 2026


Society of International Commercial and Industrial Photographers (SICIP) is a trading name of BPPA Ltd
The Society of Photographers
Clwyd Chambers, Clwyd Street, Rhyl, Denbighshire, LL18 3LA
BPPA Ltd Company Reg 0392 2894
VAT number 790 4289 05
Tel: +44 1745 356935


Home Page - Find a Photographer - Benefits of Membership - Professional Imagemaker Magazine - FREE information pack - Privacy - London Photography Show Europe's Largest 'All-Welcome' Photographic Convention
Newsletter
Subscribe to the Societies Newsletter. Subscribe here.